It’s no surprise that the majority of kids favour summer break because there is no school, however, one of the downsides of no school is the lack of activities. During the last stretch of August, parents are quickly running out of ideas to entertain, and hoping the weather holds up long enough for the kids to play outside.
Never fear, I have created a list of easy, arts and crafts activities that will help beat the boredom.
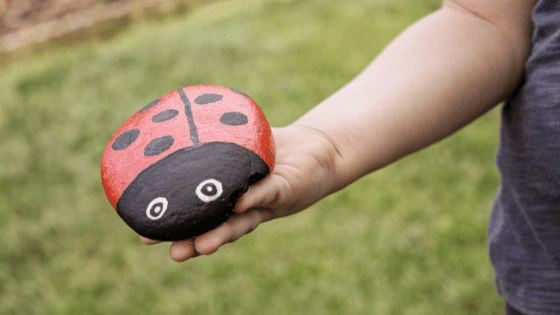
1. Stone painting
Working on stone painting projects and making crafts with painted stones is a great way to get creative this summer, and, is a wonderful meditative art activity for children.
Stone painting supplies:
- Stones – Smooth surfaces are best.
- Paint – The best paints to use are waterproof craft paint or acrylic.
- Vanish – To seal the paint.
- Paintbrushes of various sizes.
Method:
- Collect smooth stones to paint.
- Wash stones and allow them to dry in the sun.
- Set up an area to paint the stones and use newspaper to protect the surface of where you are painting.
- Paint the stones in any way you like, for example with letters, patterns, or turn them into ladybirds.
- Allow the painted rocks to dry overnight and seal with varnish.
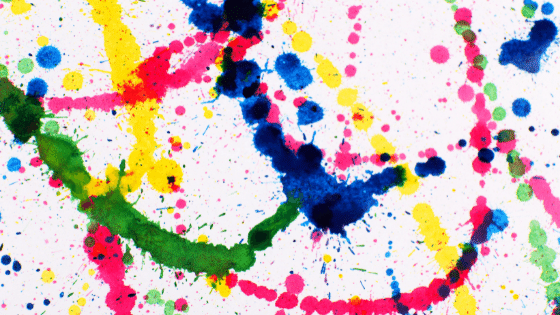
2. Water Pistol painting
Water Pistol painting is such a fun outdoor art activity for kids during the summer months. By squirting paint onto a large canvas using a paint-filled water gun you can create some wall-worthy artwork as well as having loads of fun. Water gun painting is a fun Summer art idea that works on fine motor skills for preschoolers as well as being a fun painting technique for kids of all ages.
Water pistol supplies:
- Poster paint
- Water
- Water pistols (one for each colour)
- A large canvas
Method:
- Water down your chosen paint colour and pour it into the water pistol,
- Once your water pistols are full of paint take them outside,
- prop up a large canvas,
- Get squirting!

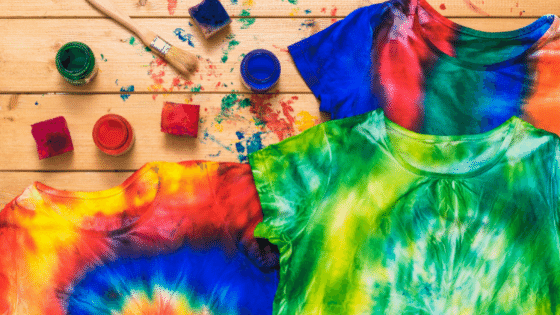
3. Tie Dye T-shirt
The crumple technique is a classic and easy way to create tie-dye designs in shirts and other fabrics. Kids and adults alike will love crumpling up the fabric and adding colour in an eclectic fashion.
Tie-Dye supplies:
- Plastic sheeting
- Soapy water
- Paper towels
- Cotton t-shirts
- Squirt bottle
- Rubber or plastic gloves
- Fabric tie-dye colours
- Rubber bands
- Marbles, coins, and/or strings
- Sealable Plastic Bags
Method:
- Prewash your t-shirt as this will remove any chemicals that might resist the dye.
- Set up the tie-dye area with the plastic sheet along with soapy water and paper towels in case you need to wash your hands or spill anything.
- To create different tie-dye designs, use rubber bands, string, marbles and coins to create the designs. By twisting the fabrics into different shapes and patterns, the ink will seep into the crevices creating textures and colour effects. By pinching the fabric around certain areas and tying the rubber band around it—or adding string, marbles or coins to create even more fun effects—you can design a tie-dye masterpiece.
- Put on the rubber/plastic covers to protect your hands from the dye.
- Use the squirt bottles to apply some of the fabric colours. Some dye kits come with them already, but if not, grab some on your own. This is a great way to add dye more precisely than just dunking.
- Let the t-shirt sit until all the excess dye has run off it.
- Run the shirt under warm water, fully rinse it while untying. After it’s been completely unfurled, run it under cool water. Once the water runs clear, wring the shirt out.
- Wash the y-shirt alone in the washing machine and let it dry.
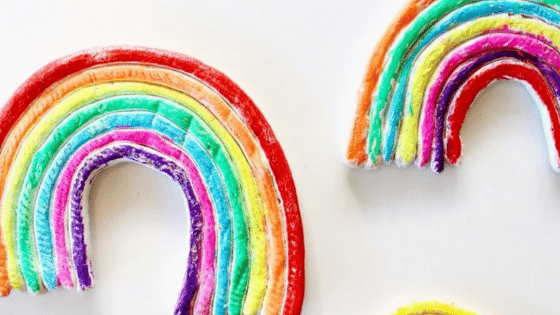
4. Salt dough rainbow sculpture
This is a simple salt dough sculpture as the only thing children need to do is ‘roll out little snakes’ similar to what they would do with play dough.
Salt dough recipe:
- 2 cups of plain flour (about 400g)
- 1 cup of water (about 200g)
- 1 cup of salt (about 200g)
Method:
- In a large bowl mix all dry ingredients.
- Gradually stir in water.
- Once combined, knead with hands until the mixture is smooth.
- Mould and shape into any creation you like.
- Once complete, bake in the oven at 180C until the dough hardens.
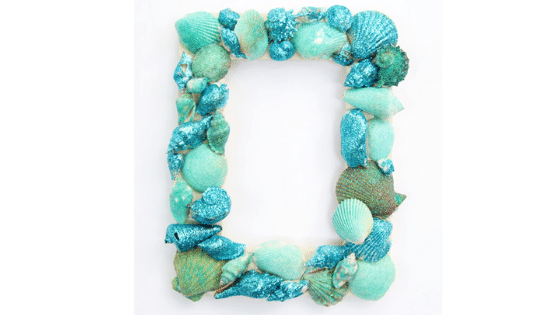
5. Glitter shell photo frame
The glitter seashell picture frame is impossible to mess up and is perfect for adding a touch of summer décor to any room. This little frame would be perfect sitting in a bathroom or on a bookshelf.
Frame supplied:
- Shells
- Extra Fine Glitter
- Mod Podge or PVA glue
- Glue Gun
- Plain Wooden Frame
Method:
- Washing the shells if they are from the beach.
- Apply a thin coat of Mod Podge or PVA glue onto a shell.
- Sprinkle a layer of extra fine glitter on top of the shell. Repeat these steps with the rest of the seashells. Leave them to dry completely.
- Using a glue gun, arrange and glue the shells to the picture frame.
- Let it completely dry – add the perfect picture to finish!
Some of these craft ideas are simple and straightforward for little ones to tackle on their own, while others require some hands-on help from parents. Either way, they’re a win for everyone involved, especially because they don’t involve watching screens or eating sweets.
Related blogs: